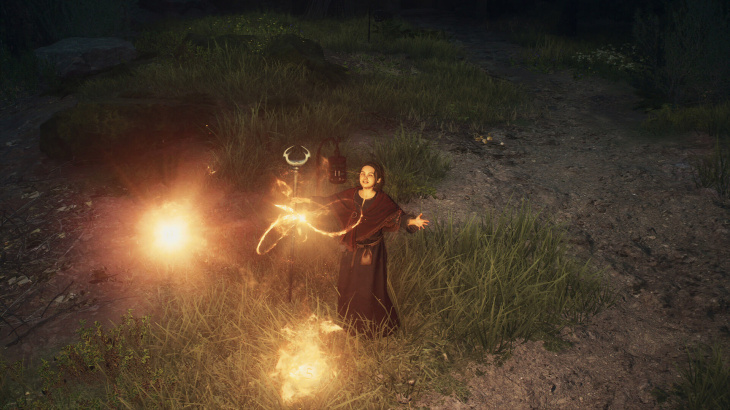
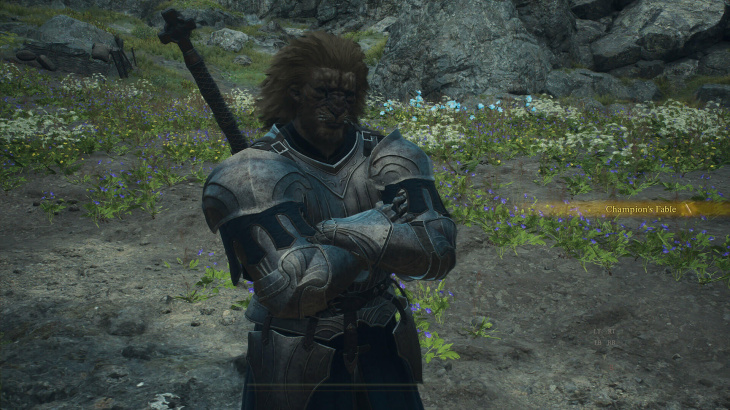
Throughout Dragon’s Dogma 2’s massive open-world are incredibly important and powerful people. These NPCs are what are known as Maisters, who have access to incredibly potent special abilities that they can give your Arisen character and their main pawn.
Three of the magic-oriented Maister’s teachings are locked behind a couple of complex fetch quests that are incredibly intricate, especially if you want all three abilities. Those three tomes and their abilities are:
Myrddin’s Chronicle - A tome for the Sorcerer class that grants the Maelstrom ability.
Conjurer’s Jottings - A tome for the Sorcerer class that grants the Meteron ability.
Enchanter’s Almanac - A tome for the Mage class that grants the Celestial Paean ability.
The two quests in question for these three tomes are “Spellbound” and “The Sorcerer’s Appraisal,” given by three different people in the world, however, two of those three both want the same 5 books. Oof.
In this guide we'll run you through how to start both of the aforementioned quests, where the spellbooks are, how to appease both parties, and how to get all 3 Maister teachings.
Spellbound is the first of the two quests you’ll realistically be able to access, and thankfully, you’ll be able to get it early on - although you won’t be able to finish it until you reach the Checkpoint Rest Town, which is around midway through the game.
In order to start the Spellbound quest, you need to head up to Eini’s Home (which has a marker on the map when you’re close enough), and that can be found to the north-northwest of the Borderwatch Outpost.
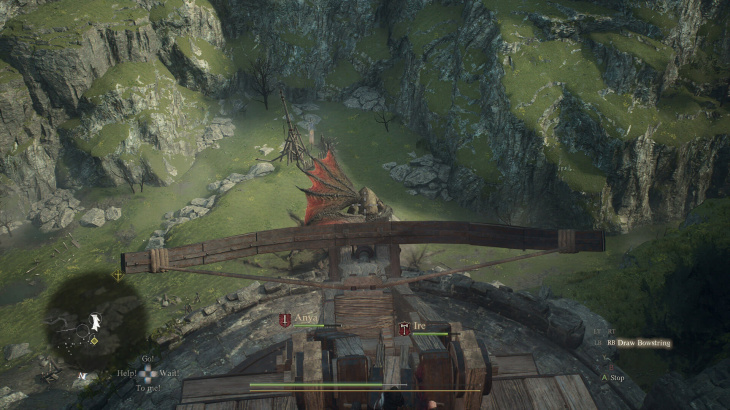
If you head west to the water from the Borderwatch Outpost and cross the stone bridge to the north near the campsite, you can then make your way to the top of the map. When you reach the campsite and the Riftstone of Abundance at the top of the hill, you then want to follow the southern of the two easterly paths. Following that will lead you to Eini’s Home.
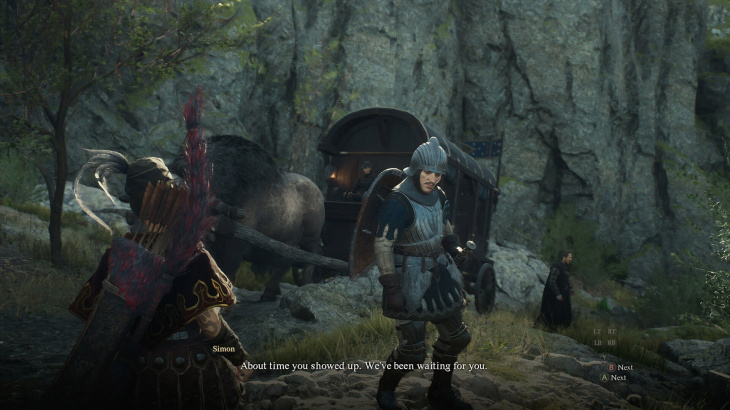
If you head inside you’ll find Eini, Eino and their granddaughter, Trysha. Now, the reason this quest is really easy to miss is because you can’t initiate it unless Trysha is in the room on her own. Fear not though, her grandparents will leave the room if you wait long enough - we found that the best solution was to use the camp nearby to advance time until the morning.
Then, when Trysha is on her own, speak to her and she’ll start talking about wanting to do magic on her own. That’s where you come in. The side quest, Spellbound, will see you seeking out 5 special grimoires that are dotted around Vermund. These 5 spellbooks are:
Let There Be Light
Fulminous Shield
Nation’s Death Knell
Towering Earth
Howling Blizzard
Here’s the thing though, Trysha isn’t the only one on the lookout for these 5 spellbooks. Oh no. So, while you don’t want to head straight to the Checkpoint Rest Town (as there are spellbooks to collect along the way), familiarise yourself with The Sorcerer’s Appraisal (below).
How to start The Sorcerer’s Appraisal
If you head to Myrddin’s Home in Checkpoint Rest Town (up the hill on the southeast side), you’ll be able to speak to Myrddin and start the side quest, The Sorcerer’s Appraisal.
In order to gain access to Myrddin’s Home, however, you will need to be wearing Courtly Breeches and the Courtly Tunic - if you head there without them, he’ll say, “I have no hospitality to extend toward one bereft of decorum.”
When you head there in the morning, dressed in your formal clothes, Myrddin will give you the side quest, “The Sorcerer’s Appraisal,” who wants the same 5 books that Trysha does.
All you need now is 5 grimoires… and a bit of deception.
All Spellbook Locations & How to Complete Both Quests
The 5 spellbooks you have to collect for both quests are unique spellbooks that are only found in very specific locations (so, whatever you do, do not use them), and will have you jetting back and forth across Vermund, especially if you want to get all 3 Maister teachings.
The reason for this is that you’re going to want to make duplicates of them all (for 6,000 each) at Ibrahim’s Scrap Store in Checkpoint Rest Town as it’s the only way to appease both quest givers… make sure you have a good amount of gold to spare.
Below we’ll run you through the best route to take (and quickest), so that you get all 5 books, and have 5 counterfeits, in no time whatsoever. Remember, if you want to speed this up, you can use Ferrystones and Portcrystals, but using the oxcarts are more than speedy enough.
Fulminous Shield Location
The first book can be purchased from Dudley for 5,000 gold. Dudley is a trader who can be found by the gates in Melve (near the Riftstone).
Towering Earth Location
The next book can be found in Vernworth. You must do a few things first for this one, though. You need to complete the main quest “The Caged Magistrate,” which requires completing the side quest, “The Heel of History.”
This will move Magistrate Waldhar from the Vernworth prison to the Gracious Hand’s Vault. Then, you must complete “A Magisterial Amenity,” by collecting Waldhar’s spectacles from Vernworth Hall inside the Vernworth Castle region. Once you’ve done all that, return to Magistrate Waldhar in The Gracious Hand’s Vault and he’ll give you Towering Earth.
Nation’s Death Knell Location
This grimoire is one of the easiest out of the 5 to get. Simply head to the bell room in the Ancient Battleground (north-northeast of the Checkpoint Rest Town) and you’ll find this one there on display next to the bell. The best way to find this room is to finish the “Toiled to Rest” side quest with Oskar. This means you end up in the same room as not only the Ancient Battleground Key, but also Nation’s Death Knell.
Let There Be Light Location
From the Ancient Battleground, head south to the Checkpoint Rest Town and head to Myrddin’s Home dressed in formal wear (as discussed above). This will allow you to start The Sorcerer’s Appraisal side quest. Once you have it in your quest log, head outside and climb the broken rocky wall around the edge of the property so you can jump onto his balcony. In the room the other side of the balcony doors, on the desk, will be the Let There Be Light book. Make sure you’re not seen, though, otherwise Myrddin has a potential to be aggro’d and attack you.
Howling Blizzard Location
Now, after getting Let There Be Light, you want to head to Ibrahim’s Scrap Store in the Checkpoint Rest Town and make a copy of Fulminous Shield (which will become Fruminous Shield) - you may as well use this time to make copies of all 4 books too (you will need 2 of Fulminous Shield though).
The best way to do it is to hand over the book, go to the nearby bench, and then “Doze Off” 4 times in a row without leaving the bench. When you wake up from the 4th nap (each nap is usually around 6 hours or so), the book should be ready to pick up. Rinse and repeat this with all the books until you have a full collection (plus one extra of Fulminous Shield).
From there, head all the way east to the Nameless Village and find Wendy (we found her in the house west of the Nameless Inn). She will want the Fulminous Shield book, and will give you the Howling Blizzard book in return. Give her the counterfeit copy (Fruminous Shield) and you’ll get Howling Blizzard.
Job’s a good ‘un! Now you should have all 5 originals of the books that both Trysha and Mryddin wanted.
Getting All 3 Maister Teaching Tomes
From the Nameless Village, head all the way back west to the Checkpoint Rest Town, and make a copy of the Howling Blizzard book. Now, you should have 10 books: 5 counterfeits and 5 originals.
From there you’ll want to head up to Myrddin’s Home and give him all 5 of the counterfeits. This is for a very good reason that will become apparent in a second. Giving Myrddin the 5 counterfeits will finish The Sorcerer’s Appraisal side quest, and net you Myrddin’s Chronicle (for the Maelstrom ability for the Sorcerer class).
Now, the reason you need to give the 5 originals to Trysha is because doing so will unlock her latent powers. So, head back to Eini’s Home, wait till Trysha is in the room alone and give her the 5 books.
Then, you’re going to want to head to the nearby camp, rest for 2 days (and also leave your party there using ‘wait’) and then head back to Eini’s Home. At this point you should hear a scream. When you get down to the house, Trysha has lost control of her powers and you’ll be needed to step in.
Instead of killing her, though (don’t attack her at all), just run around and try to tackle her with “Grab” button - the point of this is to waste her energy on magic, and then when she’s tired you can grab her and tackle her to the ground, stopping her from doing any more damage. Doing so successfully will bring the situation to a close.
To get the tomes, though, you will need to go away again and camp for another couple of days, to advance time. Then, head back to Eini’s Home.
When you’re there, speak to both Trysha and Eini. This will close the quest, while also netting you Conjurer’s Jottings (the Meteron ability for the Sorcerer class) and Enchanter’s Almanac (the Celestial Paean ability for the Mage class).
That’s how it works in an ideal world. However, for some bizarre reason - like it did with us - this might not unlock both tomes - you clearly need to be max affinity with each of them to get the tome as a gift.
So, in order to get max affinity with them, because you can't give them gifts, you’re going to have to try and force an escort mission with each of them. We did this by spamming the talk option with them, and then going to the nearby camp and resting for 24-hours. That should trigger it.
Once the escort mission for each of them is complete, you'll need to head back to Eini’s Home to collect each tome.
And finally, if that doesn't work for Eini (again, like it didn’t for us), try giving a gift to Eino as well. After we did that, we spoke to Eini and she gave us the tome.
And that, ladies and gents, is how to complete Spellbound and The Sorcerer's Appraisal, and get all 3 Maister teachings for the Mage and Sorcerer classes.


Wednesday, March 27, 2024
Throughout Dragon’s Dogma 2’s massive open-world are incredibly important and powerful people. These NPCs are what are known as Maisters, who have access to incredibly potent special abilities that they can give your Arisen character and their main pawn.
Three of the magic-oriented Maister’s teachings are locked behind a couple of complex fetch quests that are incredibly intricate, especially if you want all three abilities. Those three tomes and their abilities are:
The two quests in question for these three tomes are “Spellbound” and “The Sorcerer’s Appraisal,” given by three different people in the world, however, two of those three both want the same 5 books. Oof.
In this guide we'll run you through how to start both of the aforementioned quests, where the spellbooks are, how to appease both parties, and how to get all 3 Maister teachings.
How to start Spellbound
Spellbound is the first of the two quests you’ll realistically be able to access, and thankfully, you’ll be able to get it early on - although you won’t be able to finish it until you reach the Checkpoint Rest Town, which is around midway through the game.
In order to start the Spellbound quest, you need to head up to Eini’s Home (which has a marker on the map when you’re close enough), and that can be found to the north-northwest of the Borderwatch Outpost.
If you head west to the water from the Borderwatch Outpost and cross the stone bridge to the north near the campsite, you can then make your way to the top of the map. When you reach the campsite and the Riftstone of Abundance at the top of the hill, you then want to follow the southern of the two easterly paths. Following that will lead you to Eini’s Home.
If you head inside you’ll find Eini, Eino and their granddaughter, Trysha. Now, the reason this quest is really easy to miss is because you can’t initiate it unless Trysha is in the room on her own. Fear not though, her grandparents will leave the room if you wait long enough - we found that the best solution was to use the camp nearby to advance time until the morning.
Then, when Trysha is on her own, speak to her and she’ll start talking about wanting to do magic on her own. That’s where you come in. The side quest, Spellbound, will see you seeking out 5 special grimoires that are dotted around Vermund. These 5 spellbooks are:
Here’s the thing though, Trysha isn’t the only one on the lookout for these 5 spellbooks. Oh no. So, while you don’t want to head straight to the Checkpoint Rest Town (as there are spellbooks to collect along the way), familiarise yourself with The Sorcerer’s Appraisal (below).
How to start The Sorcerer’s Appraisal
If you head to Myrddin’s Home in Checkpoint Rest Town (up the hill on the southeast side), you’ll be able to speak to Myrddin and start the side quest, The Sorcerer’s Appraisal.
In order to gain access to Myrddin’s Home, however, you will need to be wearing Courtly Breeches and the Courtly Tunic - if you head there without them, he’ll say, “I have no hospitality to extend toward one bereft of decorum.”
When you head there in the morning, dressed in your formal clothes, Myrddin will give you the side quest, “The Sorcerer’s Appraisal,” who wants the same 5 books that Trysha does.
All you need now is 5 grimoires… and a bit of deception.
All Spellbook Locations & How to Complete Both Quests
The 5 spellbooks you have to collect for both quests are unique spellbooks that are only found in very specific locations (so, whatever you do, do not use them), and will have you jetting back and forth across Vermund, especially if you want to get all 3 Maister teachings.
The reason for this is that you’re going to want to make duplicates of them all (for 6,000 each) at Ibrahim’s Scrap Store in Checkpoint Rest Town as it’s the only way to appease both quest givers… make sure you have a good amount of gold to spare.
Below we’ll run you through the best route to take (and quickest), so that you get all 5 books, and have 5 counterfeits, in no time whatsoever. Remember, if you want to speed this up, you can use Ferrystones and Portcrystals, but using the oxcarts are more than speedy enough.
Fulminous Shield Location
The first book can be purchased from Dudley for 5,000 gold. Dudley is a trader who can be found by the gates in Melve (near the Riftstone).
Towering Earth Location
The next book can be found in Vernworth. You must do a few things first for this one, though. You need to complete the main quest “The Caged Magistrate,” which requires completing the side quest, “The Heel of History.”
This will move Magistrate Waldhar from the Vernworth prison to the Gracious Hand’s Vault. Then, you must complete “A Magisterial Amenity,” by collecting Waldhar’s spectacles from Vernworth Hall inside the Vernworth Castle region. Once you’ve done all that, return to Magistrate Waldhar in The Gracious Hand’s Vault and he’ll give you Towering Earth.
Nation’s Death Knell Location
This grimoire is one of the easiest out of the 5 to get. Simply head to the bell room in the Ancient Battleground (north-northeast of the Checkpoint Rest Town) and you’ll find this one there on display next to the bell. The best way to find this room is to finish the “Toiled to Rest” side quest with Oskar. This means you end up in the same room as not only the Ancient Battleground Key, but also Nation’s Death Knell.
Let There Be Light Location
From the Ancient Battleground, head south to the Checkpoint Rest Town and head to Myrddin’s Home dressed in formal wear (as discussed above). This will allow you to start The Sorcerer’s Appraisal side quest. Once you have it in your quest log, head outside and climb the broken rocky wall around the edge of the property so you can jump onto his balcony. In the room the other side of the balcony doors, on the desk, will be the Let There Be Light book. Make sure you’re not seen, though, otherwise Myrddin has a potential to be aggro’d and attack you.
Howling Blizzard Location
Now, after getting Let There Be Light, you want to head to Ibrahim’s Scrap Store in the Checkpoint Rest Town and make a copy of Fulminous Shield (which will become Fruminous Shield) - you may as well use this time to make copies of all 4 books too (you will need 2 of Fulminous Shield though).
The best way to do it is to hand over the book, go to the nearby bench, and then “Doze Off” 4 times in a row without leaving the bench. When you wake up from the 4th nap (each nap is usually around 6 hours or so), the book should be ready to pick up. Rinse and repeat this with all the books until you have a full collection (plus one extra of Fulminous Shield).
From there, head all the way east to the Nameless Village and find Wendy (we found her in the house west of the Nameless Inn). She will want the Fulminous Shield book, and will give you the Howling Blizzard book in return. Give her the counterfeit copy (Fruminous Shield) and you’ll get Howling Blizzard.
Job’s a good ‘un! Now you should have all 5 originals of the books that both Trysha and Mryddin wanted.
Getting All 3 Maister Teaching Tomes
From the Nameless Village, head all the way back west to the Checkpoint Rest Town, and make a copy of the Howling Blizzard book. Now, you should have 10 books: 5 counterfeits and 5 originals.
From there you’ll want to head up to Myrddin’s Home and give him all 5 of the counterfeits. This is for a very good reason that will become apparent in a second. Giving Myrddin the 5 counterfeits will finish The Sorcerer’s Appraisal side quest, and net you Myrddin’s Chronicle (for the Maelstrom ability for the Sorcerer class).
Now, the reason you need to give the 5 originals to Trysha is because doing so will unlock her latent powers. So, head back to Eini’s Home, wait till Trysha is in the room alone and give her the 5 books.
Then, you’re going to want to head to the nearby camp, rest for 2 days (and also leave your party there using ‘wait’) and then head back to Eini’s Home. At this point you should hear a scream. When you get down to the house, Trysha has lost control of her powers and you’ll be needed to step in.
Instead of killing her, though (don’t attack her at all), just run around and try to tackle her with “Grab” button - the point of this is to waste her energy on magic, and then when she’s tired you can grab her and tackle her to the ground, stopping her from doing any more damage. Doing so successfully will bring the situation to a close.
To get the tomes, though, you will need to go away again and camp for another couple of days, to advance time. Then, head back to Eini’s Home.
When you’re there, speak to both Trysha and Eini. This will close the quest, while also netting you Conjurer’s Jottings (the Meteron ability for the Sorcerer class) and Enchanter’s Almanac (the Celestial Paean ability for the Mage class).
That’s how it works in an ideal world. However, for some bizarre reason - like it did with us - this might not unlock both tomes - you clearly need to be max affinity with each of them to get the tome as a gift.
So, in order to get max affinity with them, because you can't give them gifts, you’re going to have to try and force an escort mission with each of them. We did this by spamming the talk option with them, and then going to the nearby camp and resting for 24-hours. That should trigger it.
Once the escort mission for each of them is complete, you'll need to head back to Eini’s Home to collect each tome.
And finally, if that doesn't work for Eini (again, like it didn’t for us), try giving a gift to Eino as well. After we did that, we spoke to Eini and she gave us the tome.
And that, ladies and gents, is how to complete Spellbound and The Sorcerer's Appraisal, and get all 3 Maister teachings for the Mage and Sorcerer classes.